To begin exploring the world of .NET assemblies, you’ll first create a single-file *.dll assembly (named CarLibrary) that contains a small set of public types. To build a code library using Visual Studio 2010, select the Class Library project workspace via the File > New Project… menu option (see Figure 14-4).
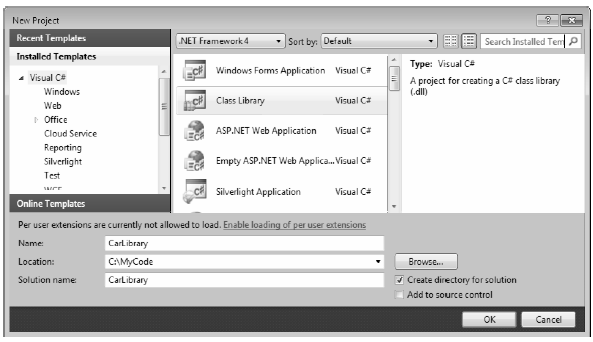
Figure 14-4. Creating a C# code library
The design of your automobile library begins with an abstract base class named Car that defines various state data via automatic property syntax. This class also has a single abstract method named TurboBoost(), which makes use of a custom enumeration (EngineState) representing the current condition of the car’s engine:
using System;
using System.Collections.Generic;
using System.Linq;
using System.Text;

namespace CarLibrary
{
    // Represents the state of the engine.
    public enum EngineState
    { engineAlive, engineDead }

    // The abstract base class in the hierarchy.
    public abstract class Car
    {
        public string PetName {get; set;}
        public int CurrentSpeed {get; set;}
        public int MaxSpeed {get; set;}

        protected EngineState egnState = EngineState.engineAlive;
        public EngineState EngineState
        {
            get { return egnState; }
        }

        public abstract void TurboBoost();

        public Car(){}
        public Car(string name, int maxSp, int currSp)
        {
            PetName = name; MaxSpeed = maxSp; CurrentSpeed = currSp;
        }
    }
}
Now assume you have two direct descendents of the Car type named MiniVan and SportsCar. Each overrides the abstract TurboBoost() method by displaying an appropriate message via a Windows Forms message box. Insert a new C# class file into your project named DerivedCars.cs, which contains the following code:
using System;
using System.Windows.Forms;
namespace CarLibrary
{
    public class SportsCar : Car
    {
        public SportsCar(){ }
        public SportsCar(string name, int maxSp, int currSp)
            : base (name, maxSp, currSp){ }

        public override void TurboBoost()
        {
            MessageBox.Show("Ramming speed!", "Faster is better...");
        }
    }

    public class MiniVan : Car
    {
        public MiniVan(){ }
        public MiniVan(string name, int maxSp, int currSp)
            : base (name, maxSp, currSp){ }

        public override void TurboBoost()
        {
            // Minivans have poor turbo capabilities!
            egnState = EngineState.engineDead;
            MessageBox.Show("Eek!", "Your engine block exploded!");
        }
    }
}
Notice how each subclass implements TurboBoost() using the Windows Form’s MessageBox class, which is defined in the System.Windows.Forms.dll assembly. For your assembly to make use of the types defined within this external assembly, the CarLibrary project must set a reference to this binary via the Add Reference dialog box (see Figure 14-5), which you can access through the Visual Studio Project > Add Reference menu selection.
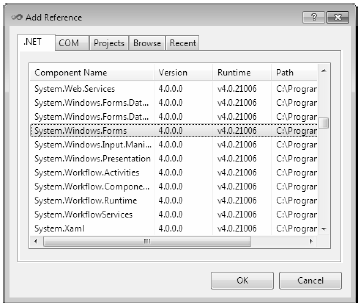
Figure 14-5. Referencing external .NET assemblies using the Add Reference dialog box
It is really important to understand that the assemblies displayed in the .NET tab of the Add Reference dialog box do not represent each and every assembly on your machine. The Add Reference dialog box will not display your custom assemblies, and it does not display all assemblies located in the GAC. Rather, this dialog box simply presents a list of common assemblies that Visual Studio 2010 is preprogrammed to display. When you are building applications that require the use of an assembly not listed within the Add Reference dialog box, you need to click the Browse tab to manually navigate to the *.dll or *.exe in question.
Note Be aware that the Recent tab of the Add Reference dialog box keeps a running list of previously referenced assemblies. This can be handy, as many .NET projects tend to use the same core set of external libraries.
Before using CarLibrary.dll from a client application, let’s check out how the code library is composed under the hood. Assuming you have compiled this project, load CarLibrary.dll into ildasm.exe (see Figure 14-6).
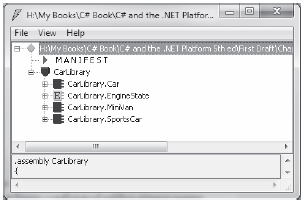
Figure 14-6. CarLibrary.dll loaded into ildasm.exe
Now, open the manifest of CarLibrary.dll by double-clicking the MANIFEST icon. The first code block in a manifest specifies all external assemblies required by the current assembly to function correctly. As you recall, CarLibrary.dll made use of types within mscorlib.dll and System.Windows.Forms.dll, both of which are listed in the manifest using the .assembly extern token:
.assembly extern mscorlib
{
    .publickeytoken = (B7 7A 5C 56 19 34 E0 89 )
    .ver 4:0:0:0
}
.assembly extern System.Windows.Forms
{
    .publickeytoken = (B7 7A 5C 56 19 34 E0 89 )
    .ver 4:0:0:0
}
Here, each .assembly extern block is qualified by the .publickeytoken and .ver directives. The .publickeytoken instruction is present only if the assembly has been configured with a strong name (more details on strong names in the section “Understanding Strong Names” later in this chapter). The .ver token defines (of course) the numerical version identifier of the referenced assembly.
After the external references, you will find a number of .custom tokens that identify assembly-level attributes (copyright information, company name, assembly version, etc.). Here is a (very) partial listing of this chunk of MANIFEST data:
.assembly CarLibrary
{
    .custom instance void ...AssemblyDescriptionAttribute...
    .custom instance void ...AssemblyConfigurationAttribute...
    .custom instance void ...RuntimeCompatibilityAttribute...
    .custom instance void ...TargetFrameworkAttribute...
    .custom instance void ...AssemblyTitleAttribute...
    .custom instance void ...AssemblyTrademarkAttribute...
    .custom instance void ...AssemblyCompanyAttribute...
    .custom instance void ...AssemblyProductAttribute...
    .custom instance void ...AssemblyCopyrightAttribute...
...
    .ver 1:0:0:0
}
.module CarLibrary.dll
Typically these settings are established visually using the Properties editor of your current project. Now, switching back to Visual Studio 2010, if you double-click on the Properties icon within the Solution Explorer, you can click on the “Assembly Information...” button located on the (automatically selected) Application tab. This will bring up the GUI editor shown in Figure 14-7.
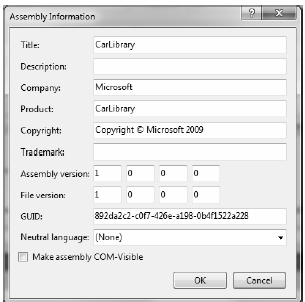
Figure 14-7. Editing assembly information using Visual Studio’s Properties editor
When you save your changes, the GUI editor updates your project’s AssemblyInfo.cs file, which is maintained by Visual Studio 2010 and can be viewed by expanding the Properties node of the Solution Explorer; see Figure 14-8).

Figure 14-8 The AssemblyInfo.cs file is updated as you use the GUI Properties editor
If you view the contents of this C# file, you’ll see a number of .NET attributes sandwiched between square brackets, for example:
[assembly: AssemblyTitle("CarLibrary")]
[assembly: AssemblyDescription("")]
[assembly: AssemblyConfiguration("")]
[assembly: AssemblyCompany("Microsoft")]
[assembly: AssemblyProduct("CarLibrary")]
[assembly: AssemblyCopyright("Copyright © Microsoft 2010")]
[assembly: AssemblyTrademark("")]
[assembly: AssemblyCulture("")]
Chapter 15 examines the role of attributes in depth, so don’t sweat the details at this point. For now, just be aware that a majority of the attributes in AssemblyInfo.cs will be used to update the .custom token values within an assembly MANIFEST.
Recall that an assembly does not contain platform-specific instructions; rather, it contains platformagnostic common intermediate language (CIL) instructions. When the .NET runtime loads an assembly into memory, the underlying CIL is compiled (using the JIT compiler) into instructions that can be understood by the target platform. For example, if you double-click the TurboBoost() method of the SportsCar class, ildasm.exe will open a new window showing the CIL tokens that implement this method:
.method public hidebysig virtual instance void
    TurboBoost() cil managed
{
    // Code size 18 (0x12)
    .maxstack 8
    IL_0000: nop
    IL_0001: ldstr "Ramming speed!"
    IL_0006: ldstr "Faster is better..."
    IL_000b: call valuetype [System.Windows.Forms]System.Windows.Forms.DialogResult
        [System.Windows.Forms]System.Windows.Forms.MessageBox::Show(string, string)
    IL_0010: pop
    IL_0011: ret
} // end of method SportsCar::TurboBoost
Again, while most .NET developers don’t need to be deeply concerned with the details of CIL on a daily basis, Chapter 17 provides more details on its syntax and semantics. Believe it or not, understanding the grammar of CIL can be helpful when you are building more complex applications that require advanced services, such as runtime construction of assemblies (again, see Chapter 17).
Before we build some applications that make use of our custom .NET library, if you press the Ctrl+M keystroke combination, ildasm.exe displays the metadata for each type within the CarLibrary.dll assembly (see Figure 14-9).
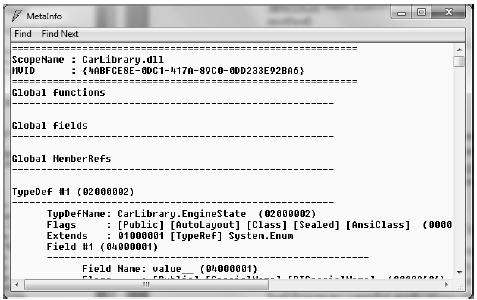
Figure 14-9 Type metadata for the types within CarLibrary.dll
As explained in the next chapter, an assembly’s metadata is a very important element of the .NET platform, and serves as the backbone for numerous technologies (object serialization, late binding, extendable applications, etc.). In any case, now that you have looked inside the CarLibrary.dll assembly, you can build some client applications that make use of your types!
Because each of the CarLibrary types has been declared using the public keyword, other assemblies are able to use them as well. Recall that you may also define types using the C# internal keyword (in fact, this is the default C# access mode). Internal types can be used only by the assembly in which they are defined. External clients can neither see nor create types marked with the internal keyword.
Note NET does provides a way to specify “friend assemblies” that allow internal types to be consumed by a set of specified assemblies. Look up the InternalsVisibleToAttribute class in the .NET Framework 4.0 SDK documentation for details if you are interested; however, be aware that the construction of friend assemblies is quite rare.
To use your library’s functionality, create a new C# Console Application project named CSharpCarClient. Once you have done so, set a reference to CarLibrary.dll using the Browse tab of the Add Reference dialog box (if you compiled CarLibrary.dll using Visual Studio, your assembly is located under the \bin\Debug subdirectory of the CarLibrary project folder). At this point you can build your client application to make use of the external types. Update your initial C# file as follows:
using System;
using System.Collections.Generic;
using System.Linq;
using System.Text;

// Don't forget to import the CarLibrary namespace!
using CarLibrary;

namespace CSharpCarClient
{
    public class Program
    {
        static void Main(string[] args)
        {
            Console.WriteLine("***** C# CarLibrary Client App *****");
            // Make a sports car.
            SportsCar viper = new SportsCar("Viper", 240, 40);
            viper.TurboBoost();

            // Make a minivan.
            MiniVan mv = new MiniVan();
            mv.TurboBoost();
            Console.ReadLine();
        }
    }
}
This code looks just like the code of the other applications developed thus far in the text. The only point of interest is that the C# client application is now making use of types defined within a separate custom assembly. Go ahead and run your program. As you’d expect, the execution of this program results in the display of various message boxes.
It is important to point out that Visual Studio 2010 placed a copy of CarLibrary.dll into the \bin\Debug folder of the CSharpCarClient project folder. This can be verified by clicking the Show All Files button of the Solution Explorer (see Figure 14-10).
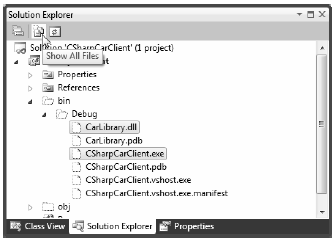
Figure 14-10 Visual Studio 2010 copies private assemblies to the client’s directory
As explained later in this chapter, CarLibrary.dll has been configured as a “private” assembly (which is the automatic behavior for all Visual Studio 2010 Class Library projects). When you reference private assemblies in new applications (such as CSharpCarClient.exe), the IDE responds by placing a copy of the library in the client application’s output directory.
To illustrate the language-agnostic attitude of the .NET platform, let’s create another Console Application (VisualBasicCarClient), this time using Visual Basic (see Figure 14-11). Once you have created the project, set a reference to CarLibrary.dll using the Add Reference dialog box, which can be activated by the Project > Add Reference menu option.
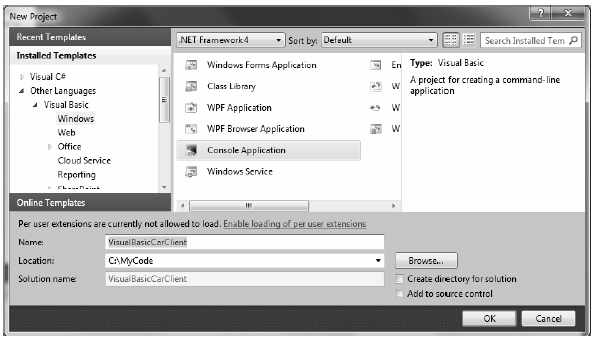
Figure 14-11 Creating a Visual Basic Console Application
Like C#, Visual Basic requires you to list each namespace used within the current file. However, Visual Basic offers the Imports keyword rather than the C# using keyword, so add the following Imports statement within the Module1.vb code file:
Imports CarLibrary

Module Module1
    Sub Main()
    End Sub
End Module
Notice that the Main() method is defined within a Visual Basic module type (which has nothing to do with a *.netmodule file for a multifile assembly). In a nutshell, modules are a Visual Basic notation for defining a class that can contain only static methods (much like a C# static class). In any case, to exercise the MiniVan and SportsCar types using the syntax of Visual Basic, update your Main() method as follows:
Sub Main()
    Console.WriteLine("***** VB CarLibrary Client App *****")

    ' Local variables are declared using the Dim keyword.
    Dim myMiniVan As New MiniVan()
    myMiniVan.TurboBoost()

    Dim mySportsCar As New SportsCar()
    mySportsCar.TurboBoost()
    Console.ReadLine()
End Sub
When you compile and run your application, you will once again find a series of message boxes displayed. Furthermore, this new client application has its own local copy of CarLibrary.dll located under the bin\Debug folder.
A very enticing aspect of .NET development is the notion of cross-language inheritance. To illustrate, let’s create a new Visual Basic class that derives from SportsCar (which was authored using C#). First, add a new class file to your current Visual Basic application (by selecting the Project < Add Class menu option) named PerformanceCar.vb. Update the initial class definition by deriving from the SportsCar type using the Inherits keyword. Then, override the abstract TurboBoost() method using the Overrides keyword:
Imports CarLibrary

' This VB class is deriving from the C# SportsCar.
Public Class PerformanceCar
    Inherits SportsCar

    Public Overrides Sub TurboBoost()
        Console.WriteLine("Zero to 60 in a cool 4.8 seconds...")
    End Sub

End Class
To test this new class type, update the module’s Main() method as follows:
Sub Main()
...
    Dim dreamCar As New PerformanceCar()

    ' Use Inherited property.
    dreamCar.PetName = "Hank"
    dreamCar.TurboBoost()
    Console.ReadLine()
End Sub
Notice that the dreamCar object is able to invoke any public member (such as the PetName property) found up the chain of inheritance, regardless of the fact that the base class was defined in a completely different language and in a completely different assembly! The ability to extend classes across assembly boundaries in a language-independent manner is a very natural aspect of the .NET development cycle. This makes it very easy to use compiled code written by individuals who would rather not build their shared code with C#.
Source Code The VisualBasicCarClient project is located under the Chapter 14 subdirectory.